Create another Call to action row/section
On the preview of the home page, click the "Edit page" link.

If you have left the preview of the home page, go back to the home edit page by going to Dashboard > Pages > All Pages, Scroll down to home page and click the edit link.
Click the "Add Row" button.
In the "Add New Row" dialog. Make sure the Set row layout is set to 1, then click Insert.
if the row appears between the existing rows, hover over the up and down arrow and drag it down, under the Sydney FP: Latest News row.

Click "Add widget", select the "Sydney FP: Call to action" widget.
Once the widget is inserted in the row, hover over the "Sydney FP: Call to action" widget, click the Edit link.
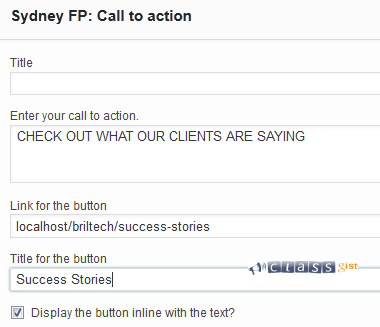
In the dialog, leave the title blank, enter a text like "CHECK OUT WHAT OUR CLIENTS ARE SAYING" in the "Enter your call to action" textbox, enter the URL address "localhost/briltech/success-stories" in the "link for the button" text box(this success-stories page will be created in Success stories), enter a title like "Success Stories" in the "Title for the button" text box, check the "Display the button inline with the text?" checkbox, click Done.

Edit this fourth row by hovering over the ranch and clicking the Edit Row link.

In the Edit Row dialog that pops up, go to the right and click on Theme to expand it, in the top/bottom padding, enter 30, scroll down to Background Color, click the Select Color button and enter "#252525" in the text box, scroll down to Row Layout and select Full width, click Done.
Click Update. You can click the "View Page" link to see the changes you just made.

What Is Next?
Step by Step
This tutorial is part of a series that walks you through creating your first website or blog using WordPress.
Next Step, 10. Create the social media widget row/section
Previous Step - 8. Create the Latest/recent blog post row/section
Start from the beginning - Create your first website or blog using WordPress