On the preview of the Portfolio/Image Gallery Page, go back to the Dashboard Page by clicking Briltech > Dashboard.

Go to Dashboard > Pages > Add New, it will take you to "Add New" page.
Enter a title like "Contact Us", Click on the "Page Builder" tab. Go to "Page Attributes" section, Change Template to Front Page.

1. Create the first row
a. Click "Add Row".
In the "Add New Row" dialog. Change the set row layout from 2 to 1, then click the Insert button.
Now we have a new row. Edit the row, hover over the ranch and click the "Edit Row" link.
In the Edit Row dialog that pops up, go to the right and click on Theme to expand it, in the top/bottom padding, enter 40, scroll down to Row Layout and select Full width, click Done.
Click "Add widget", select "Visual Editor" widget,
Once it is inserted in the row, hover over the "Visual Editor" widget, click the Edit link.
In the "Visual Editor" dialog, Enter "Contact Us" as the title,
b. Click "Done".
2. Create the second row
a. Click "Add Row".
In the "Add New Row" dialog. Leave the Set row layout to 2, change the left side of the row by clicking the 50% and changing it to 70%, change the right side to 30% , then click Insert.
Now we have a new row. Edit the row by hovering over the ranch and clicking the "Edit Row" link.
In the Edit Row dialog that pops up, go to the right and click on Theme to expand it, in the top/bottom padding, enter 20, scroll down to Row Layout and select Full width, click Done.
Lets add a widget to the left side of the row. If the left side of the row is not highlited, click it to select it (it will be highlighted).

Click "Add widget", select "Visual Editor" widget.
Once it is inserted in the row, hover over the "Visual Editor" widget, click the Edit link.
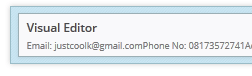
In the "Visual Editor" dialog, click "Toolbar Toggle".

Leave the title blank, in the text area, enter some contact details like email, phone number and address, insert a horizontal line after the details.

b. Click Done.
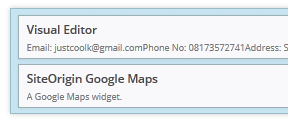
c. Lets add another widget under the visual editor widget. Make sure the left row is hightlighted by clicking the row to select it.
Click "Add widget", select "SiteOrigin Google Maps" widget.
Once it is inserted in the row, hover over the "SiteOrigin Google Maps" widget, click the Edit link.
In the "SiteOrigin Google Maps" dialog, enter your state "Lagos, LG" as the Map center(you can search for your location's address on google map and insert it here), change height to 250, click Done.
Add another widget on the right side of the row. Click the right side of the row to select it.
click "Add widget", select "Visual Editor" widget.
Once it is inserted in the row, click "Save draft".
Go the left side and click on Contact > Contact Forms, it will take you to the "Contact Forms" Page, scroll down and click the "contact form1" link, click on the "mail" tab, you can change the "To" email address to your preferred choice, change the from and subject text box, click Save.

Go the left side and click on Contact > Contact Forms, copy the text in the "Shortcode" text box.

Go to Pages > All Pages, Scroll to the Contact Us and click the edit link beneath it, it will take you to the Edit Contact Us page, scroll to the Visual Editor widget, click the Edit link.

In the "Visual Editor" dialog, click on the tab named "Text", paste the shortcode.

d. Click "Done".
e. Click "Publish". Once the page is updated, click the "View Page" link to see how the page looks like now.
20. On the preview page, click the Edit Page link.

3. Create the third row
a. Click "Add Row".
In the "Add New Row" dialog. Make sure the Set row layout is set to 1, click Insert.
Now we have a new row. if the row appears between the existing rows, hover over the up and down arrow and drag it down, under the last row.
Click "Add widget", select "SiteOrigin Social Media Buttons" widget.
Once it is inserted in the row, hover over the "SiteOrigin Social Media Buttons" widget, click the Edit link.
In the "SiteOrigin Social Media Buttons" dialog, add the first social media button by clicking "Add".

Click the "Select network" section to expand it, click the first drop down and select facebook, enter "https://www.facebook.com/yourfacebookpagename" in the URL textbox, in the Background color, click the Select Color button and enter "#252525" in the textbox, then click the Facebook section to collapse it.

Click Add, repeat the steps for adding facebook - this time select twitter, after entering your twitter details, click the Twitter section to collapse it.
Click Add, repeat the steps for adding facebook and twitter - this time select google+ or any social network account you have.
You can add as many social buttons as you want, using the same steps.
b. Scroll down to "Design and Layout" section, click it to expand it, change Button theme to Flat, change Padding to Low, change Align to Center.

c. Click "Done".
d. Edit this SiteOrigin Social Media Buttons row by hovering over the ranch and clicking "Edit Row" link.

e. In the Edit Row dialog that pops up, go to the right and click Theme to expand it, in the top/bottom padding, enter 10, scroll down to Background Color, click the Select Color button and enter "#1c1c1c" in the text box, scroll down to Row Layout and select Full width, click "Done".
Click Update. Once the page is updated, click the "View Page" link to see how the page looks like now.
What Is New?
Step by Step
This tutorial is part of a series that walks you through creating your first website or blog using WordPress.
Next Step - 15. Create the Testimonial/Success Story page
Previous Step - 13. Create the portfolio/image gallery page
Start from the beginning - Create your first website or blog using WordPress