1. On the preview of the Testimonial/Success Story Page, go back to the Dashboard Page by clicking Briltech > Dashboard.

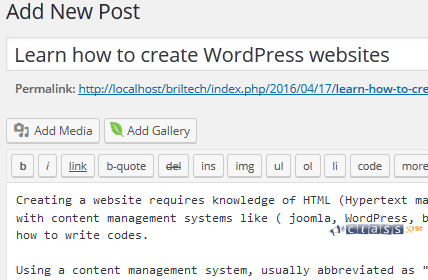
2. Go to Dashboard > Posts > Add New, it will take you to the "Add New Post" page.
3. Enter a title like "Learn how to create wordpress websites", in the text area under the title, enter the details of the post, scroll down towards the right, click the "Set featured image" link, it will pop up the "Featured Image" dialog where you can select the post's image or upload a new image.

4. Click the "Publish" button. Once the post is published, click the "View Post" link to see how the page looks like now.

Let's create some additional blog posts.
5. On the preview page of the post, click on New > Post.

6. Enter a title like "What are wordpress plugins", in the text area under the title, enter the details of the post, scroll down towards the right, click on the "Set featured image" link, it will pop up the "Featured Image" dialog. Select the post's image or upload a new image. Click the "Publish" button.
7. Create another blog post, Click the "Add New" button, Repeat step 6 to add additonal blog posts.
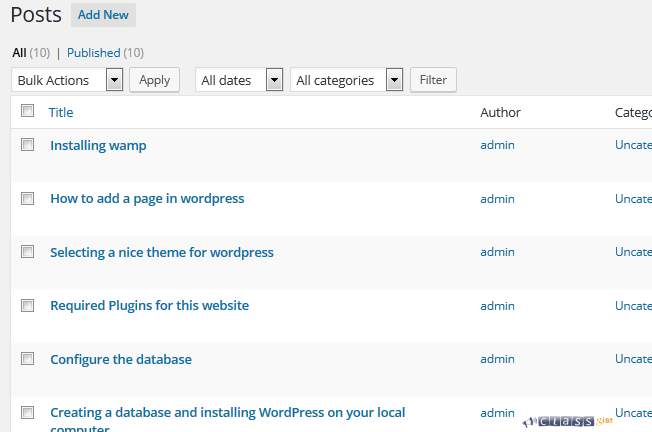
To see all the blog posts you have created, go to Dashboard > Posts > All Posts.

Delete the default post "Hello world" by hovering over it and clicking the Trash link.
Go to Trash page by clicking the trash(1) link.

Hover over the post and click Delete permanently or click the Empty Trash button.

View all your blog posts by clicking Posts > All Post. Hover over a post and click the View link

What Is Next?
Step by Step
This tutorial is part of a series that walks you through creating your first website or blog using WordPress.
Next Step - 17. Enable comments on blog posts
Previous Step - 15. Create the Testimonial/Success Story page
Start from the beginning - Create your first website or blog using WordPress