Hosting a website involves three basic steps.
Step 1. Choose a domain name and register it
You can register a domain with an internet domain registrar such as godaddy.com, enom.com, cheapname.com, register.com
Step 2. Choose a web host
There are several reputable web hosting services which include blue host, godaddy, hostgator, utiware. Choose one that supports the technology
used in creating your website and offers prices that fit your budget.
Step 3. Upload your website to the web host
You can use FTP Clients like FileZilla, CoreFTP to upload your website files to your web host
In this post, I will show you detailed steps to host the demo website you created using utiware.net web host. (Note: Same steps can be taken if you decide to use another web host).
#1. Choose and register a domain
Go to utiware.net, use the Find and Register your Perfect Domain tool to check if your domain name is available. If the domain name is available, click
the Order Now button, it will take you to the Domains Configuration page.
On the Domains Configuration page, leave the nameservers in the textbox, go ahead and click the Continue button, you will be directed to the Review & Checkout page.
On the Review & Checkout page, click the Continue Shopping button, you will be directed to the web hosting plan page.
On the web hosting plan page, select the package you want. You can start with the STARTER WEB HOSTING PLAN. Click on the Order Now button, it will take you to the Product selection page.
On the Product selection page, leave the option selected, go ahead and click the Continue button and subsequent Continue buttons till you get to the Checkout page.
You can pay using ur ATM or Bank deposit. Once you transaction is successful, you will be sent an email.
#2.Activate your web host
Once your domain name has been activated, your web hosting details and control panel information will be sent to your email. Open your email and follow the instructions to login to your control panel and create a database, the database username and password, set up your FTP and email accounts.
(Note: for the purpose of this tutorial, when creating the database, you can name it briltechdb).
#3. Export your database
Open a web browser, Type http://localhost/phpmyadmin then hit enter, click the briltechdb(14) link on the left side of the page.
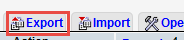
On the next page that displays, click the Export link.
On the next page, click the Go button towards the bottom left corner, this will pop up the download dialog, click the OK button.

Now open the folder where the file was downloaded to by pressing Ctrl + J on your key board, right click on briltechdb.sql and select Open Containing Folder

This will take you to where the file was downloaded to, which might be your Downloads folder. Copy the file and paste on your desktop.
Next, we will replace all references of localhost to your domain name in the database script.
On your desktop where you pasted the file(briltechdb.sql), right click the file(briltechdb), select Open With > Notepad. This will open the file in Notepad editor.
Press Ctrl + H, this will open the Replace dialog

Type localhost/briltech in the Find what text box, and www.yourdomainname.com in the Replace with text box. Click the Replace All button.
Save the file by pressing Ctrl + S. Close Notepad.
#4. Install the database on the server
From the instructions in the email, sent by your web host (utiware.net), you will see how to create the database, username and password for the database you created.
To install your database, follow these steps
a. Login to your database server, by typing the database server address sent to your email (http://phpmyadmin.utiware.net/) and entering your username and password.
b. On the left side of the page, click on briltechdb (which is the name of the database you created in your control panel).
c. Click on the Import link.

it will take you to the Importing into database page. Click the browse button and navigate to your desktop, select the briltechdb file. Click the Open button.
Back on the Importing into database page, scroll down and click the Go button. If the Import was successful, a success message will be displayed.
Go back to the home page by clicking on the phpMyAdmin logo that is by the top left corner. Click on briltechdb to view the tables in the database. Click
on wp_options table

Make sure the option_value column of the following option_name column matches the following:
siteurl begins with http://www.
home begins with http://www.
permalink_structure is set to /%postname%/


#5. Upload your web files
If you don't have a FTP Client, go to http://www.coreftp.com/ and download coreFTP client. Follow the installation instructions. Once complete, add a new
account and connect to your web host server with the FTP username and password you created in your control panel.

Enter your ftp server address, ftp username and password
Transfer all the folders and files from C:\wamp\www\briltech to the root folder (wwwroot) of your host

#6. Modify wp-config file and .htaccess file
The website on your computer points to the database that also resides on your computer. Let's change it, so that the website you uploaded will point to the correct database on the production server.
a. Modify the wp-config file
Go to C:\wamp\www\briltech, copy wp-config and paste on your desktop.
On your desktop, open the wp-config, this will open the file in your plain text editor. Adjust the following settings:
- Change the username from root to the one you created in your control panel:
/** MySQL database username */
define('DB_USER', 'root'); (~line 26)
- Change the password from being empty to the one you created in your control panel:
/** MySQL database password */
define('DB_PASSWORD', ''); (~line 29)
- Change the host from localhost to the database host sent to your email:
/** MySQL hostname */
define('DB_HOST', 'localhost'); (~line 32)
Save the file and close.
b. Modify the .htaccess file
Go to C:\wamp\www\briltech, copy .htaccess and paste on your desktop.
On your desktop, open the .htaccess, this will open the file in your plain text editor. Delete the contents of the file and replace with the following:
# BEGIN WordPress
<IfModule mod_rewrite.c>
RewriteEngine On
RewriteBase /
RewriteRule ^index.php$ - [L]
RewriteCond %{REQUEST_FILENAME} !-f
RewriteCond %{REQUEST_FILENAME} !-d
RewriteRule . /index.php [L]
</IfModule>
# End WordPress
Save the file and close.
c. Re-Upload the file
Connect your FTPClient and re-upload these two files you just modified to the wwwroot folder. If it pops up the overwrite dialog, select Overwrite All.
#7. Grant Access to folders
Login to your control panel, at the middle of your Account Homepage, hover your mouse over the Web icon and select Web Sites, you will be directed to the list of websites you own. Click on the domain name, you will be directed to the Web Site Properties page.
Under the Security Settings section, check the "Enable Write Permissions" check box, click the Update button.
#8. Check the permalink settings
Login to your website dashboard, go to Settings > Permalinks, it will take you to the Permalink Settings page.
Scroll down to Post name and check if it is selected. if it is not selected, select it and click the Save Changes button.
What Is Next?
Step by Step
This tutorial is part of a series that walks you through creating your first website or blog using WordPress.
Previous Step - 21. Secure your WordPress website
Start from the beginning - Create your first website or blog using WordPress