This tutorial is in two sections:
Section 1: Downloading the file.
Section 2: Installing the WampServer.
Section 1: Downloading the file
Step 1: Click the first link, you will be directed to a web page. When the page loads, at the top, you will see an arrow pointing downwards, click to begin the download. Check the progress of the download by pressing CTRL + J on your keyboard.
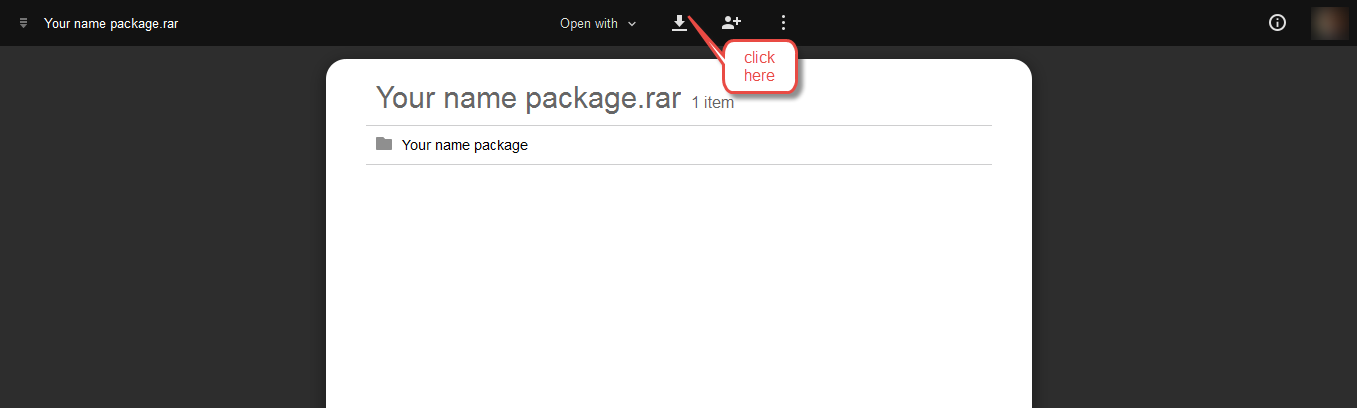
Once the download is complete, copy the downloaded file to your documents folder.
Step 2: In your email, click the WampServer link, you will be directed to a web page. When the page loads, at the top, you will see an arrow pointing downwards, click to download. Check the progress of your download by pressing CTRL + J on your keyboard.
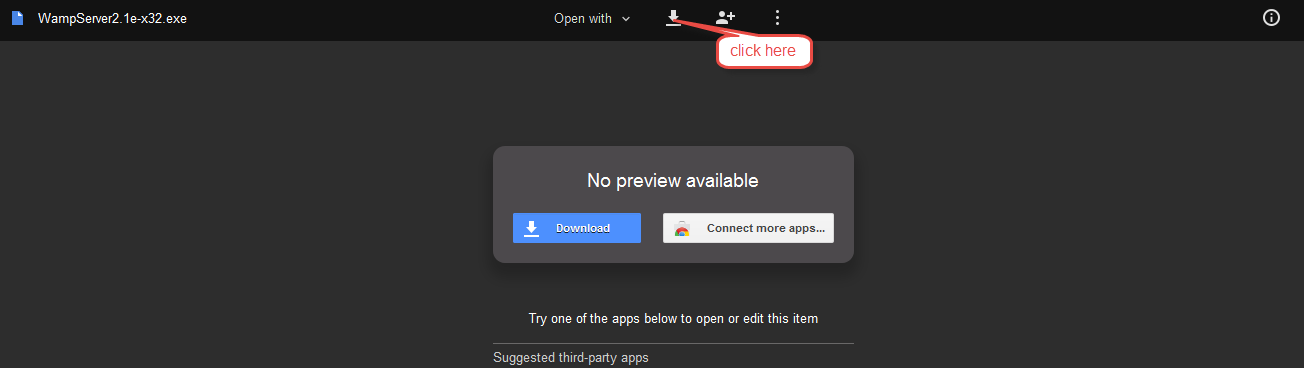
Once the download is complete, copy the downloaded file (WampServer2.1e-x32) to your documents folder
Section 2: Installing the WampServer
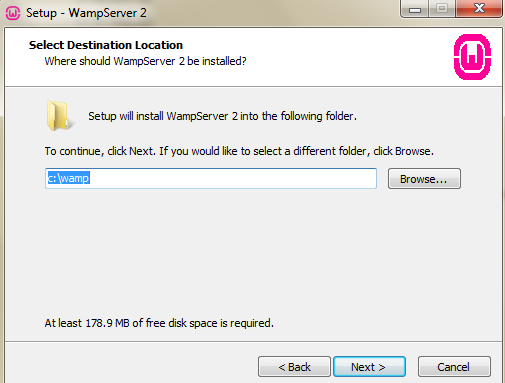
Step 1: Go to your documents folder where you just pasted the WampServer2.1e-x32 file, double-click to install it.
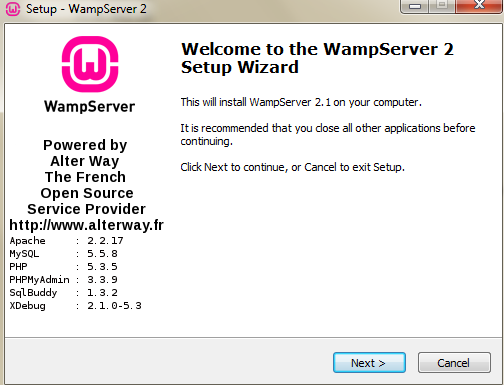
Click Next
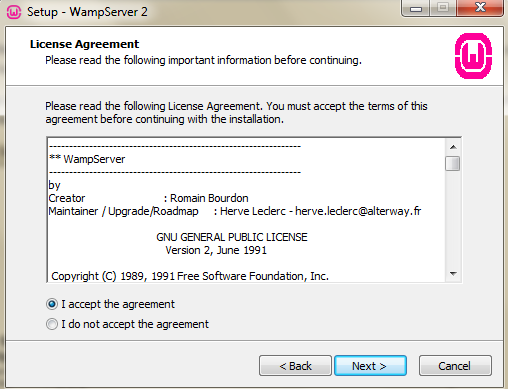
Select "I accept the agreement", click Next
Click Next
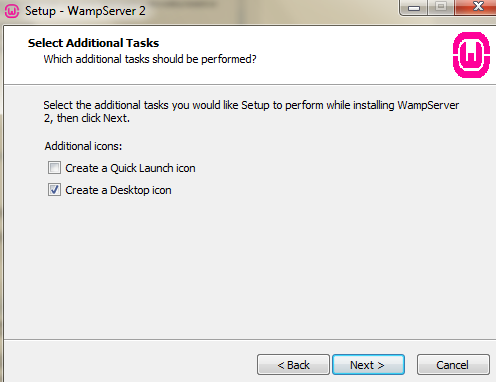
Check "Create a Desktop icon". Click Next
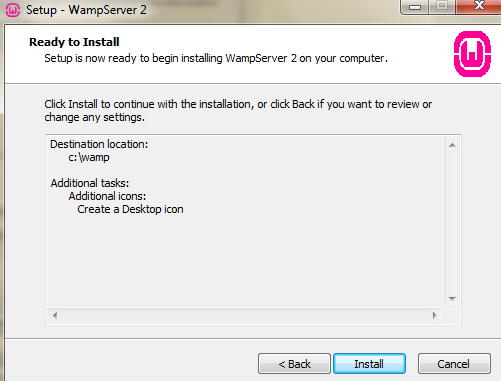
Click Install. The installation begins.
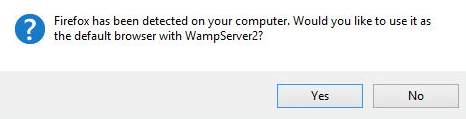
If it pops up this screen, select Yes.
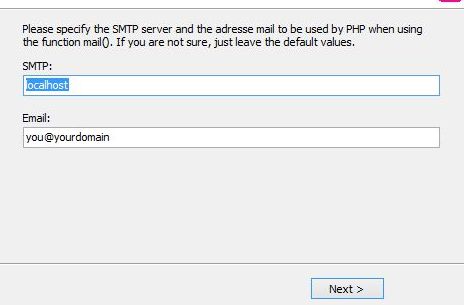
Click Next. If it pops a screen asking you to allow access to network, click Yes.
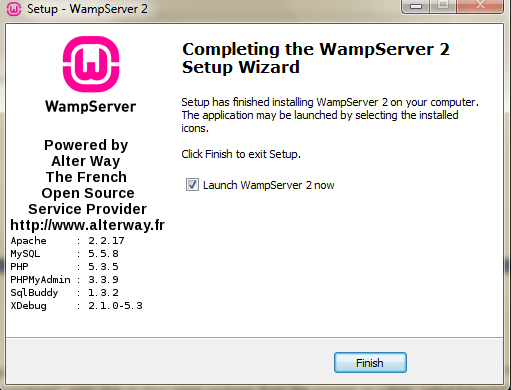
Click Finish
Step 2: Open your documents folder and double click the zip file you downloaded to reveal the folder in it. Copy the folder, then open My Computer, then open C drive (Local Disk), you will see a folder named wamp, open it you will see www folder, Open the www folder and paste the copied folder.

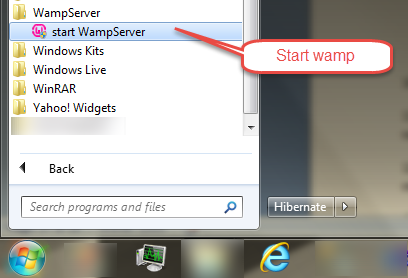
Step 3: Start the WampServer. Just like any program, you can either use one of the icons you created during the installation process or look under Start > All Programs > WampServer folder and click on "start WampServer".
After starting the WAMP server, a red W icon will appear on your taskbar. As the server starts, the W icon will go from red to orange to green. It shouldn't take more than a minute. If it seems stuck on either red or orange, you may need to reboot the system, or click on the W icon and select "Restart all Services". If it turns to green, this indicates that the server is running.

Step 4: Read the last step (step 5) in your email to set up the database
We can chat on WhatsApp(08173572741) for further assistance.